🗺️ The Humap Newsletter
Sign up for:
- Unique offers and discounts
- News and updates from the heritage, EdTech, and mapping world
- Spotlighted content from across every Humap instance
Don’t worry – we only send one email a month 😉
The Humap Overlay Wizard tool allows admin users to upload their own geospatial data as overlays. The feature is currently in beta mode and is currently limited to:
QGIS is a free and open source geographic information system. If you have basic knowledge of GIS, you can use QGIS and ESRI’s ArcGIS software to export features into Humap as overlays.
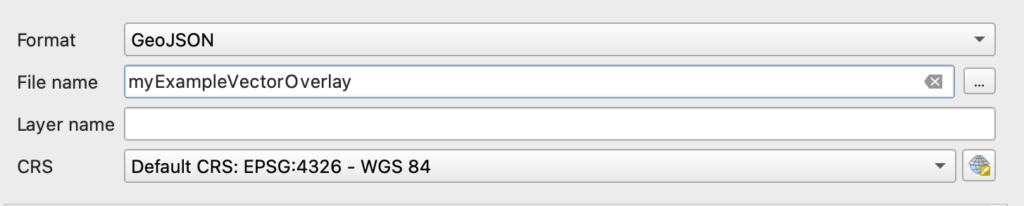
When exporting your feature layer, select the Default: CRS EPSG:4326 WGS 84 coordinate reference system. Currently, the Humap platform overlay system can only work with this CRS. To set the export’s CRS within QGIS, in the Export dialogue window select CRS > Default: CRS EPSG:4326 WGS 84
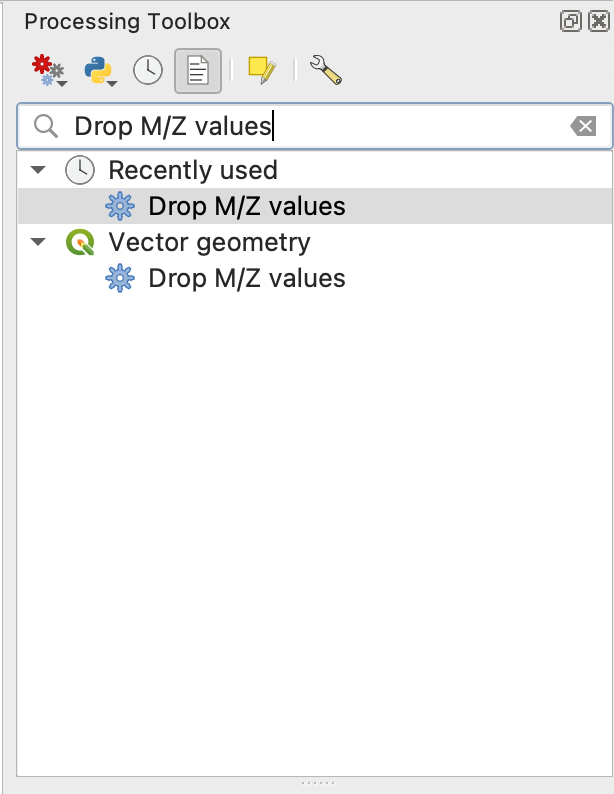
The Overlay Wizard tool geojson import will fail if any features contain z values (vertical coordinates). To remove them from your layer or features within QGIS:
If your data needs to be precisely geolocated, we recommend a resolution of five numeric points of precision when exporting to a geojson file within QGIS. Typically QGIS will render the export at a coordinate precision of 15 places by default, which is not necessary and will result in a larger than intended geojson file and data. You can change the precision within QGIS’s export dialogue window under Layer Options > Coordinate Precision
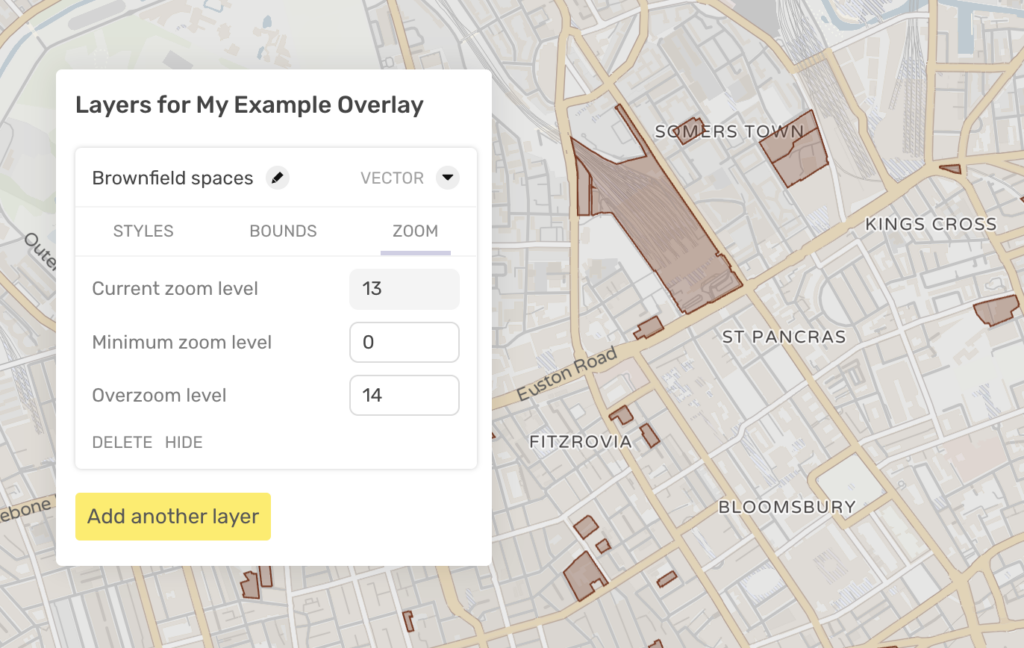
If you’ve imported your data successfully but upon zooming into the map, points and/or polygons disappear from view, open the Zoom panel in the Overlay Wizard’s layers panel by clicking the Vector dropdown arrow and clicking Zoom. The Zoom panel will indicate what zoom Level you are currently viewing on the map. Change the Overzoom Level number to the first level your data disappears. For example, if you zoom down to level 14 and then your data disappears from view, change the Overzoom Level to 14.
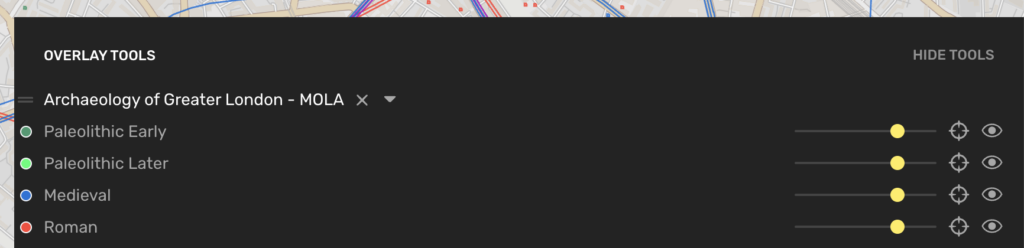
The bounds or bounding box of your data on the map will only do one thing within the Humap platform and that is provide a locate overlay icon to users. The icon will allow end users to click the locate (target) icon within the overlay toolbar and zoom into the overlay wherever it may be on the map.
To export your feature layer bounding box, select Yes in the WRITE_BBOX option in the QGIS export window. Exporting your bounding box coordinates out of QGIS will state the lat, lon coordinates of the extent within your geojson file which you can input into the Humap Overlay Wizard layers pnael Bounds section under the Vector editor options. Please note that QGIS exports the BBOX data as lon, lat so you will need to reverse the two coordinates when copying into the Overlay Wizard Southwest and Northeast extent input fields.

Alternatively, you can draw a rectangle bounding box across the extent of your data on the map. This is useful if you would prefer your bounding box to be larger than the feature extent (or smaller).
If you have access to ESRI’s ArcGIS Online, you can include raster or vector layers in your Humap project by referencing the ArcGIS Online server URL. To do so, navigate to the Layer panel and click Add layer or Add another layer. Select Add from URL and paste in your ArcGIS Online tile server address and select between an intended vector or raster layer.
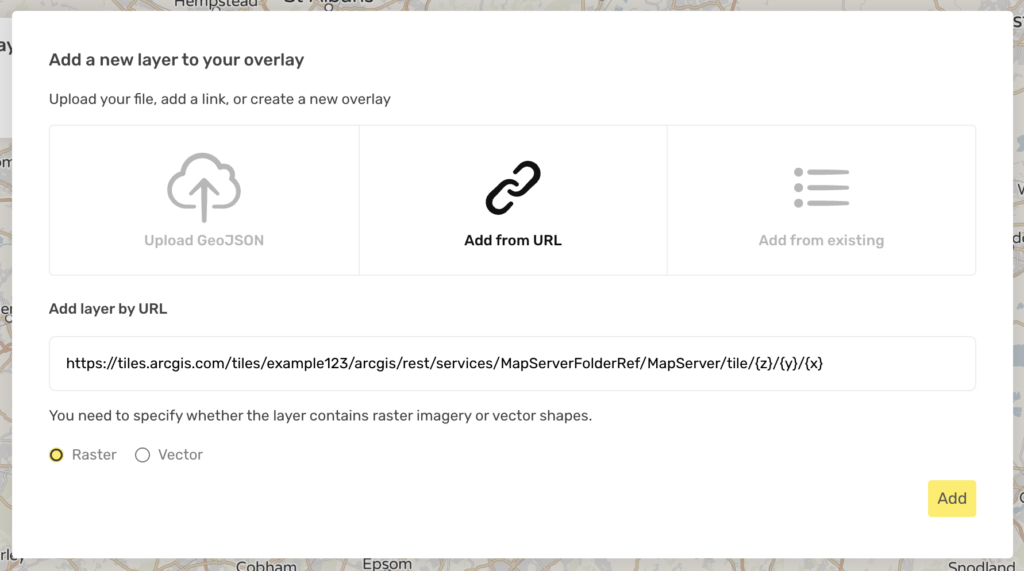
The correct format to use for your URL will be:
https://tiles.arcgis.com/tiles/example123/arcgis/rest/services/MapServerFolderRef/MapServer/tile/{z}/{y}/{x}
Typically you will need to add the following text to the end of your URL where it ends with /MapServer (as above):
/tile/{z}/{y}/{x}
The layer will load into the map immediately and allow you to edit your Layer panel options such as vector styles and zoom levels.


We usually respond in a few hours