Tray Views
What are Tray Views?
Tray Views are different templates for the left part of your map, where content and information lives.
There are two types: Introduction and Help. You can only have one of each.
This is an Introduction tray view:
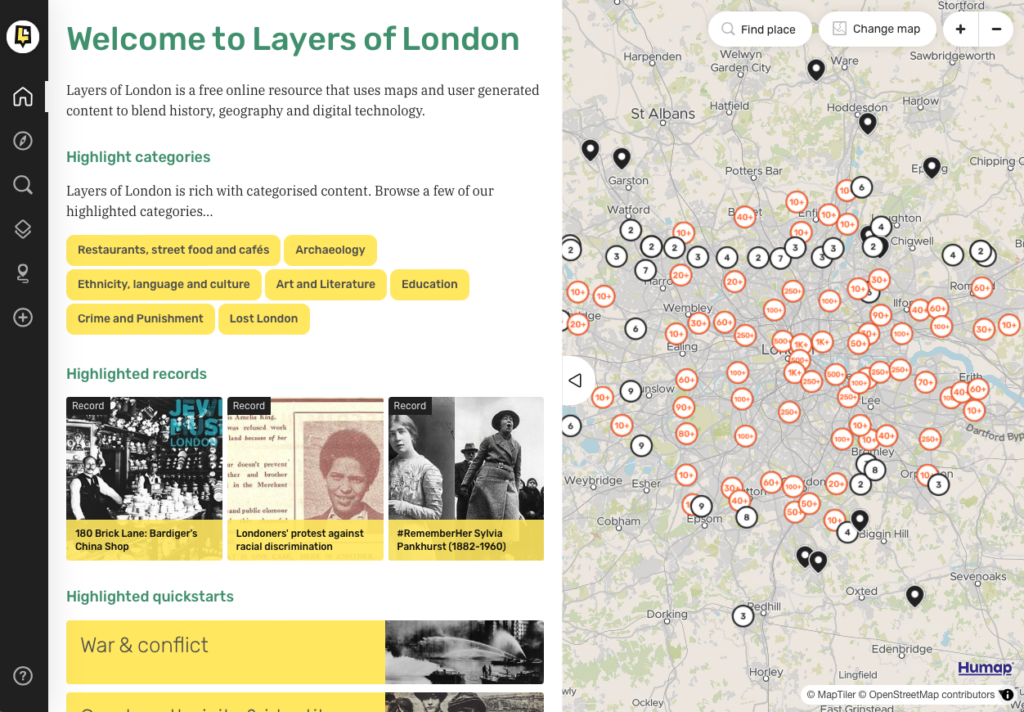
Introduction Tray Views welcome your users to the map. You can use this space to explain the point of your map and link your audience to specific pieces of content or other places on the web.
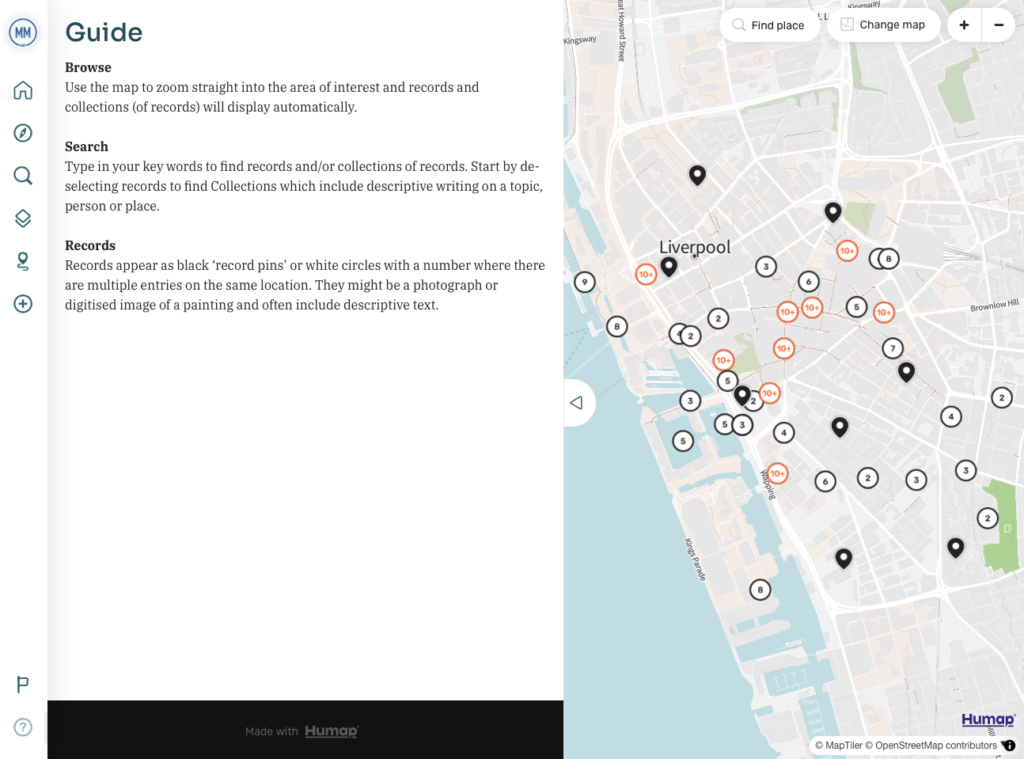
This is a Help Tray View, accessed via the ? in the bottom right of the screen.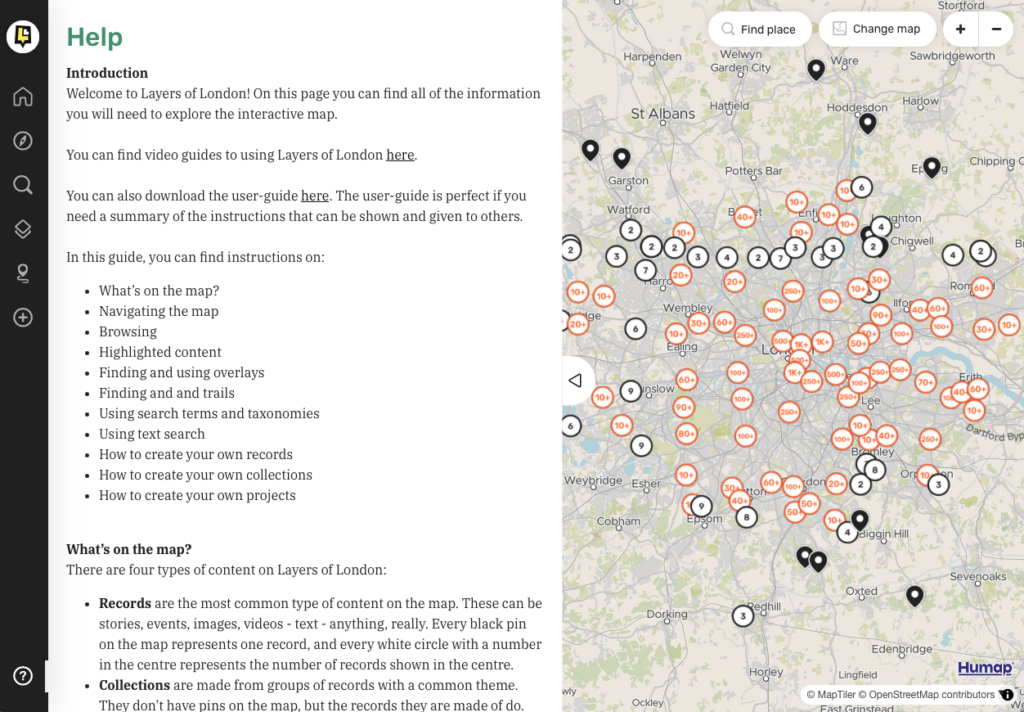
Before you create your Tray Views, you may want to have already created some taxonomies, taxonomy terms, Records, Collections, and Quick Starts. You can use them to enrich your Introductory Tray View through highlighted taxonomies and content.
This tutorial is available in both video and text/image format.
Logging in
- To access the admin area, make sure you have the Project Admin level permissions and go to your-humap-url.humap.site/admin.
- If you’re not already logged in you will be redirected to your-humap-url.humap.site/log-in and presented with this screen:

- You can then log in with your email and password.
- You can also access the admin area via the Subscription Platform, if your organisation has an institutional license and you have Subscription Admin level permissions.
- Go to https://subscription.humap.site/users/sign_in and log in with your user name and password.

- That will take you to the Subscription Platform home screen.
- There will be a list of map projects created on your subscription.
- Click Admin next to the project you would like to access, and you will be taken to the admin dashboard of that project.

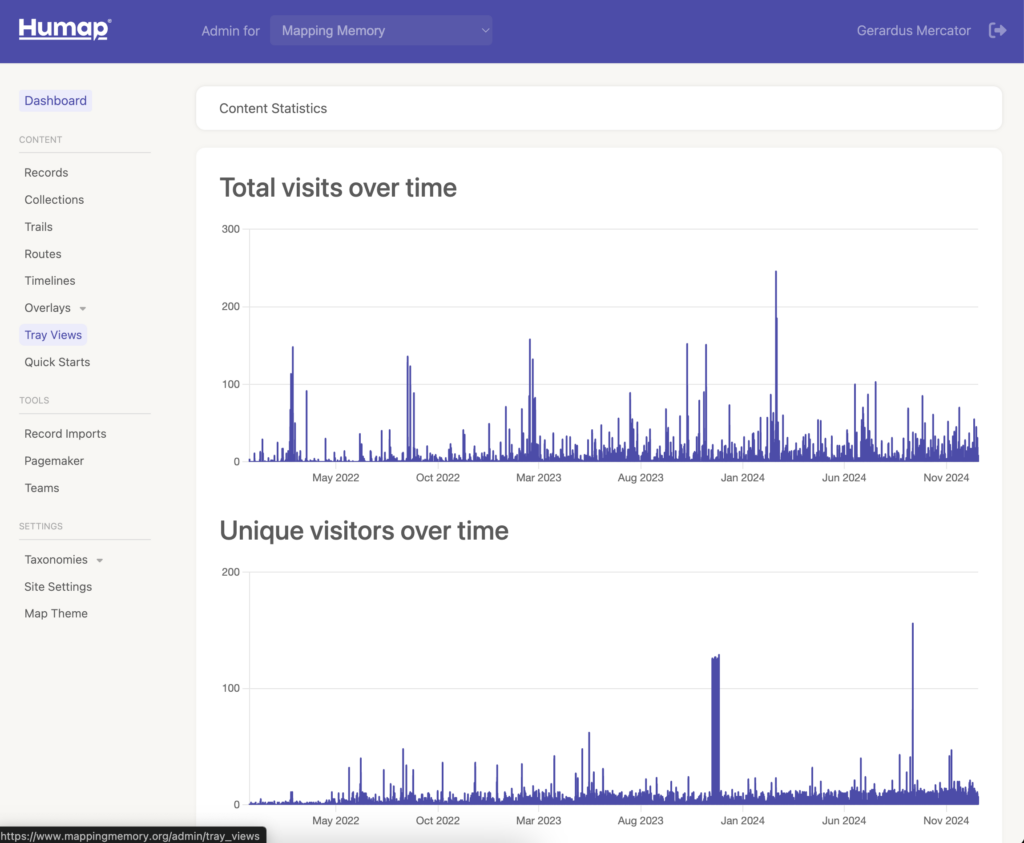
- This takes you to the home screen of Humap’s content management system.
Creating and managing Tray Views
If you have access to multiple Humap project admin areas, you’ll see a drop down area at the top of the screen. Click this to access the menu and then click the name of a project to go the admin area of that project.
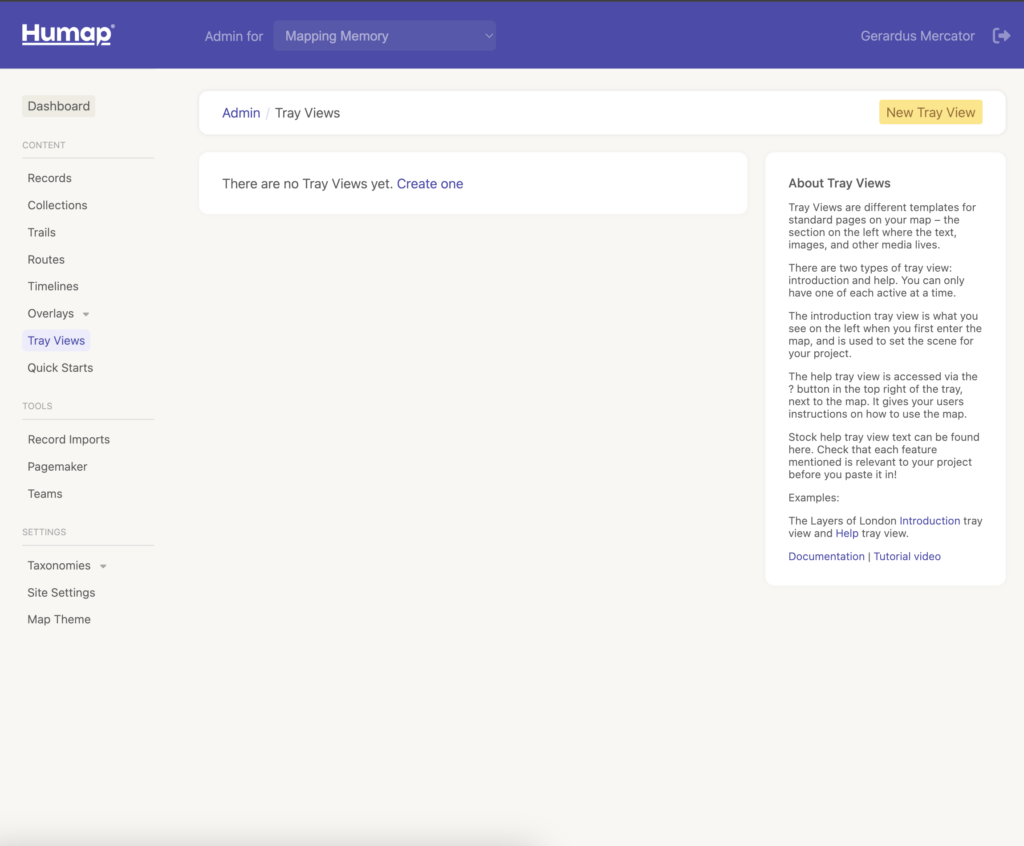
- The pages that make up the content management system are listed on the left. Click Tray Views to reach this screen:
Introductory Tray View
The introductory page is your map’s home screen, the first thing your visitors will see when they explore the map. This is where you’ll write your introduction to your map and highlight taxonomies, Records, Collections and Quick Starts.
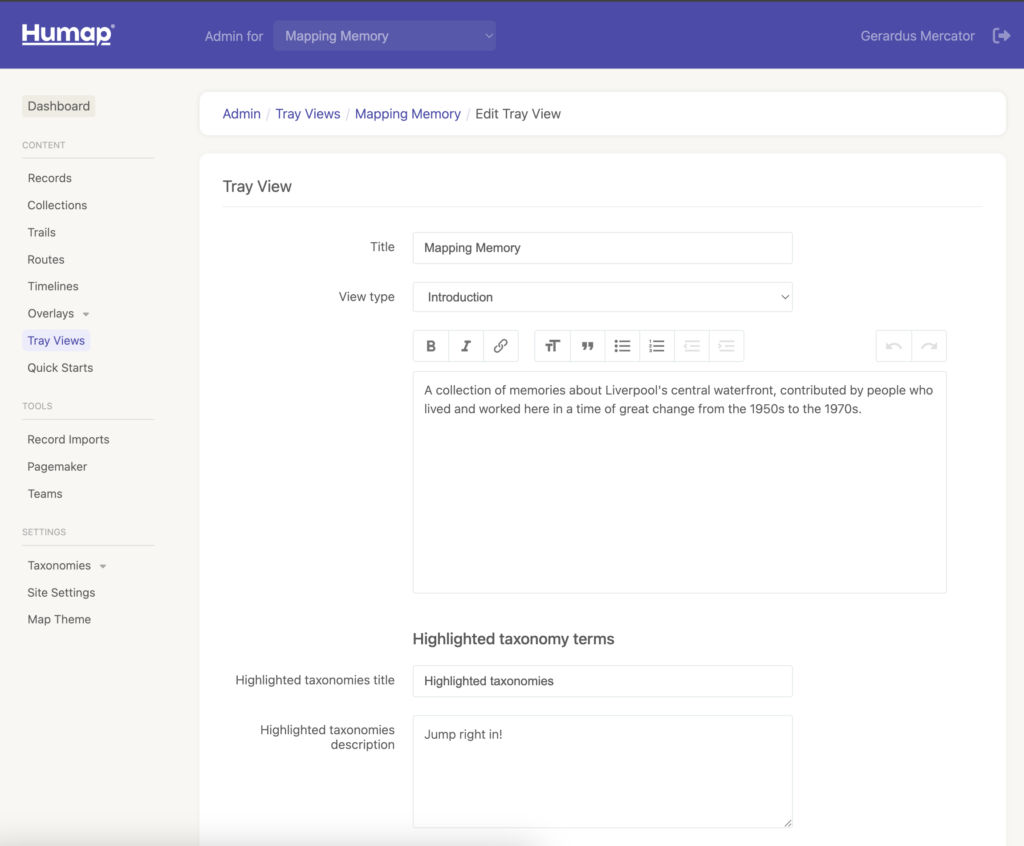
- Click New Tray View.
- Add a title in the Title field
- Use the View Type dropdown menu to select Introduction
- Add your introductory content into the larger field box. This could be a primer on your project, a discussion of methods, or a place to welcome users to your map.
Highlighyed content
- Highlighted taxonomies are links that will take your user to the results page for every item on your map tagged with that term. On Layers of London “Archaeology” is a highlighted taxonomy that links to everything on Layers of London tagged with “Archaeology.”
- Add a title and description for your highlighted taxonomies section. The taxonomies will be listed below, click into the box on the right and a list of terms and select the terms you would like to highlight.
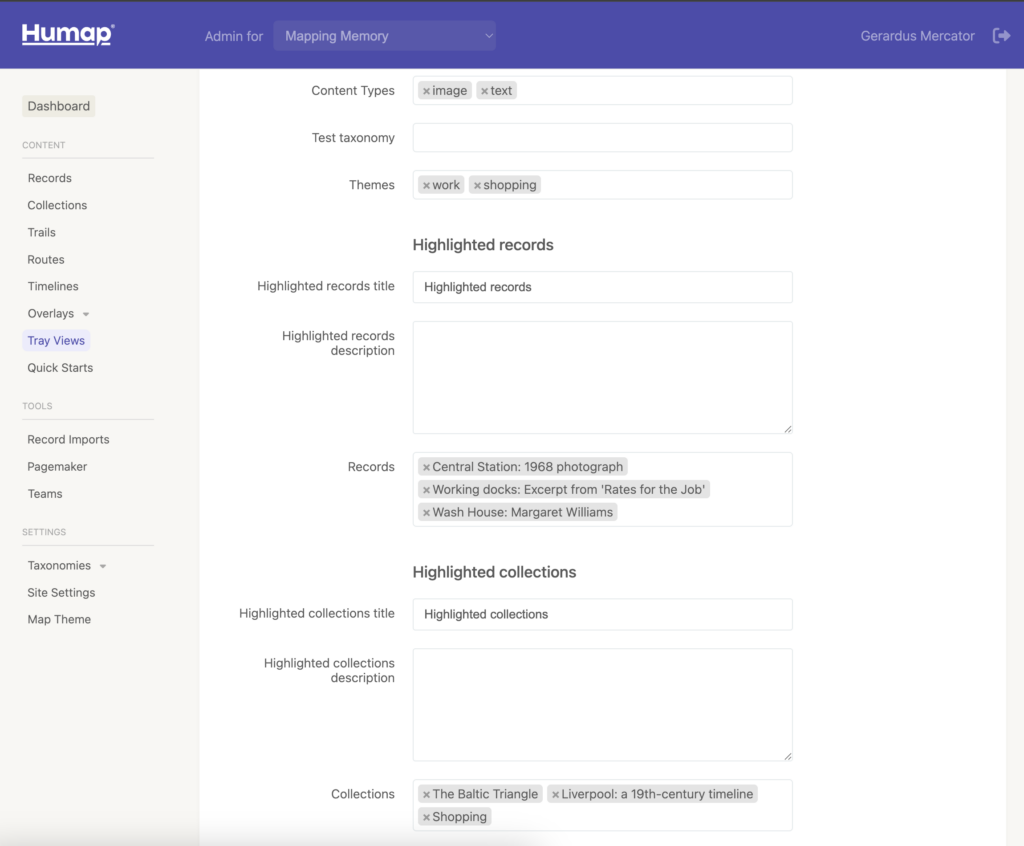
- To highlight Records, you can name the section in the title box and add a description in the box below. Clicking into the empty Records box will generate a list – click the Records you would like to highlight.
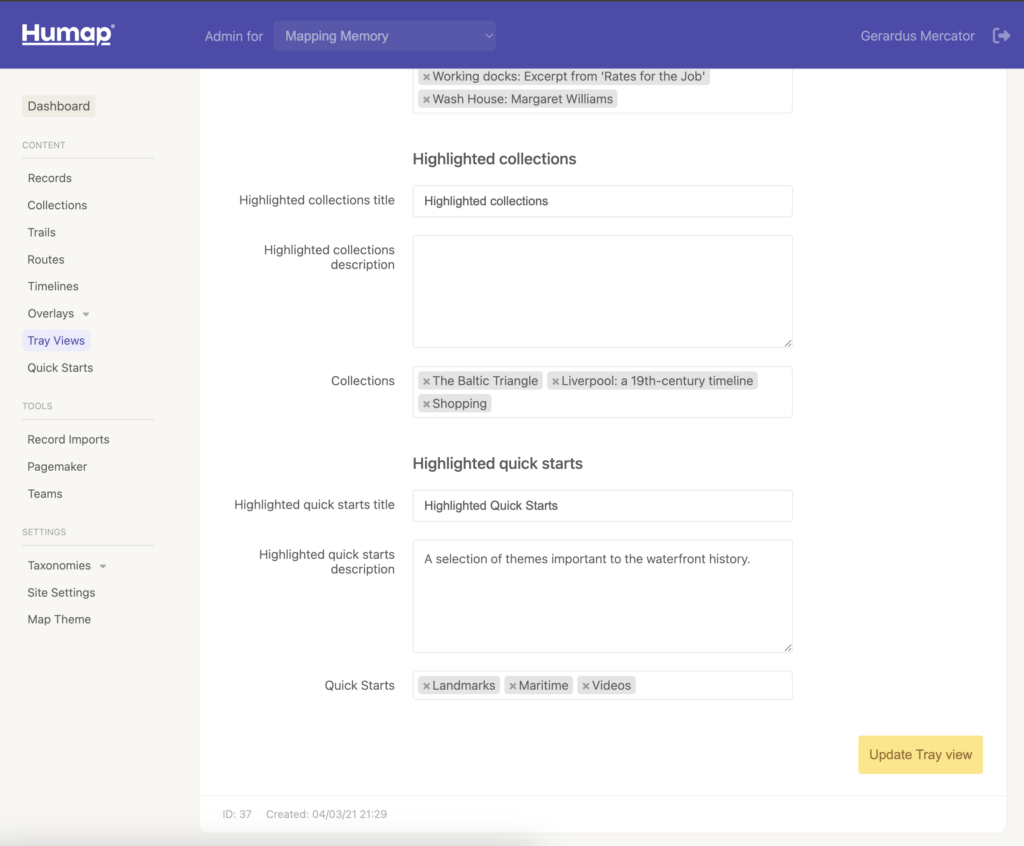
- You can do the same for Collections and Quick Starts.
Help Tray View
The help Tray View is a handy, in-map repository of useful tips and information. Scroll down for generic Humap Help & Guidance text.
Here is how it looks in the dashboard:
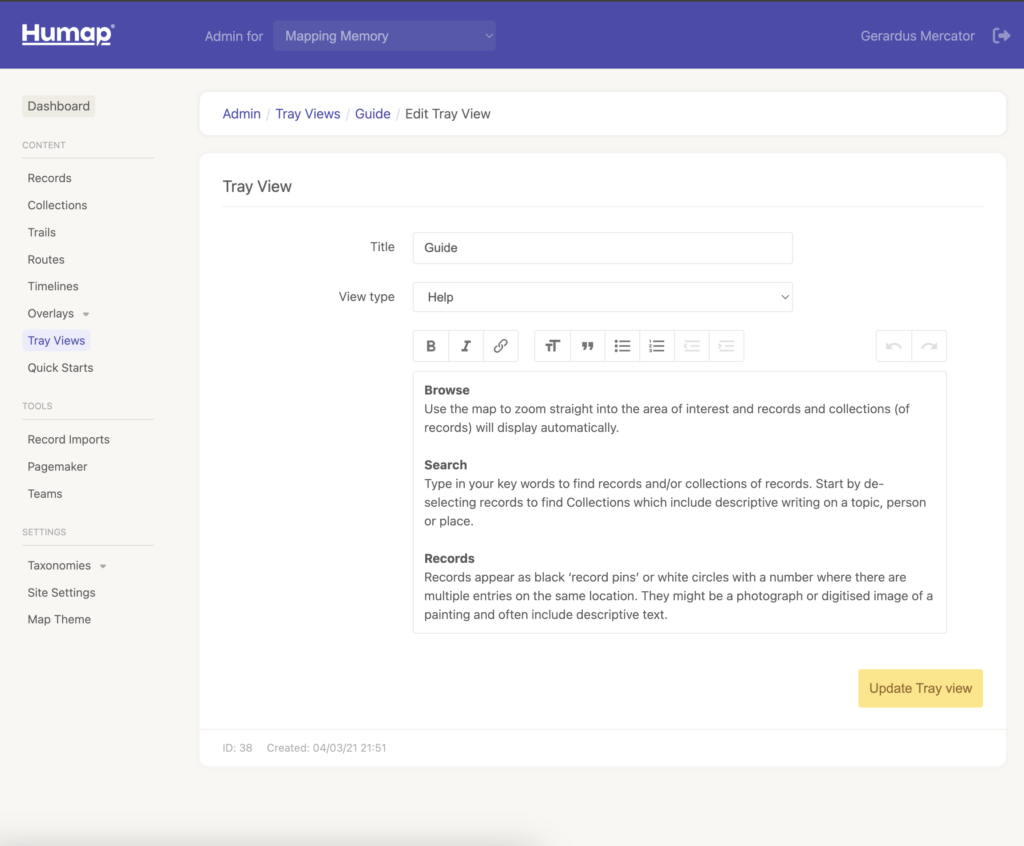
- Click New Tray View
- Add a title in the Title field
- Use the View Type dropdown menu to select Help
- Add your content into the larger field box
- Click update Tray View
Here is how this page looks on the map:
Help & guidance generic text
- What’s on the map?
- Navigating the map
- Browsing
- Highlighted content
- Finding and using overlays
- Finding and and trails
- Using search terms and taxonomies
- Using text search
- How to create your own records
- How to create your own collections
- How to create your own projects
There are four types of content on Humap:
- Records are the most common type of content on the map. These can be stories, events, images, videos – text – anything, really. Every black pin on the map represents one record, and every white circle with a number in the centre represents the number of records shown in the centre.
- Collections are made from groups of records with a common theme. They don’t have pins on the map, but the records they are made of do.
- Overlays are either historical maps or data that lies on top of the base map. Humap has over 400 of these, and they are represented on the map by a blue pin with an illustration of a square overlaying another square.
- Trails are walkable series of records that you can explore online or in person. Their pins are green with an illustration of a map pin with a route.
- Journeys and timelines tell the stories of long journeys over time.
Navigating the map
You can manually move the map around to change what you can see. This is called zooming and panning.
- To zoom in, click on the plus icon on the top right-hand corner of the map, and click the minus icon to zoom out again. The results shown in the tray will then change, returning results for the new area.
- To pan the map around, move your cursor onto a section of map without a pin and left click. You can then drag the map around in any direction and the results tray on the left will change accordingly.
The browse function of the map is great for when you want to find content in a particular area, and also for when you just want to explore the map to see what grabs your eye. All types of content can be returned and the results are based on the section of the map that is visible on the right side of your screen.
- From the map home screen, click the compass icon in the toolbar at the top of the information tray. This will take you to the browsing screen.
- The information tray will fill up with records, collections, and overlays based on the map.
- You can scroll through the tray to look at its contents.
- You can also pan and zoom around the map, changing what results are returned.
Highlighted content
- On the map home screen there are three headings: highlighted categories, highlighted records, and highlighted quickstarts.
- If you see a topic or record you are interested in, click the box or button the text or image is on to go to its dedicated page.
Finding and using overlays
- To specifically browse overlays, click on the middle icon that looks like a square overlaying another square.
- You can then scroll through the results in the tray.
- To see an overlay on the map, click on its preview image to go to its page.
- You can then click Use this overlay, in a button under the overlay image
- The map will then appear on top of the base map.
- Click Hide Pins in the top right corner to make it easier to see
- To use the overlay tools, click the show overlay tools button at the bottom of the map.
- Click the eye icon to make this overlay invisible.
- Click the target next to it to centre the overlay in the middle of the base map
- Use the slide to toggle how transparent the overlay is
- When you’re done, click the use this overlay button again to deselect it.
- To see trails, click on the icon in the toolbar that looks like a map pin with a route.
- You can then browse trails, and get a closer look at any that interest you.
- Click Start trail to see the records that make up the trail.
- Click Next or Prev to cycle through them.
- Click Quit Trail to quit.
Using search terms and taxonomies
- To get to the search screen click the magnifying glass in the toolbar.
- Click the boxes that are relevant to your interests. For example, if you wanted to find information about Islington and Camden, and Politics & Government, Imagined & Future London, and Health and Welfare, you could click on those options For more detailed categories, click the downwards arrow next to the descriptive text in the buttons. A pop-up menu will appear with more specific tickboxes.
- Scroll down to decide which types of content you would like returned. A default search will return records, collections, overlays, and trails. If you do not want a certain type of content returned, click the box next to it to deselect that content type.
- Do you want results for the whole map, or just the part visible? On a default search, results will be returned for the entire map. Click the button to change that to just the visible parts of the map.
- When you have clicked all of the things you are interested in, click on the Search button at the bottom of the information tray.
- Your results will be returned in the information tray and you can then scroll to see your results.
- To return to the search page, click Search Again in the top right-hand corner of the information tray, or click on the magnifying glass in the toolbar.
- Click Clear Your Search in the top right hand corner to return all of the boxes to their defaults.
Using text search
You can also use the text bar at the top of the search screen to look for your own search terms – either in tandem with the pre-existing ones, or independently.
Here’s how it works:
- To just use the text box, type your query into the box and either press Enter on your keyboard or scroll to the bottom of the tray and press Search.
- To use the textbox and the categories, type in your query and then all the categories that interest you.
- Example: if you wanted to know about Religion and Worship in the Edwardian era Croydon and Enfield, you could click “Religion and Worship”, “Croydon”, “Enfield”, and then type “Edwardian era” into the search bar (and press Enter!).
- For another example, if you wanted to find the Charles Booth poverty map, you could:
- Go to the overlays tab – but there are over 400 maps on Humap, and it would take ages to scroll through them all.
- Go to the search bar and type in “Booth” – but lots of content on Humap has the word “Booth”, so that would also take ages
- OR, you could type “Booth” in the search box, and then scroll down and deselect “Records”, “Collections”, and “Trails”, so that only overlays with the word “Booth” are returned.
This section is all about how you can add to the map. Here you can find instructions on:
- How to make records.
- How to make collections.
- How to make projects (a space for you to collaborate with other users. You can only add records that you or your collaborator(s) has/have made into the project).
All of the tutorials for user-generated content can be found here.Anyone can add to the map, but you will need to make a (free!) Humap account first.
- Load the homepage for Humap (the screen before the map).
- In the top right corner is a person icon, with two options next to it: Log In, and Sign Up.
- Click Sign up.
- All Humap needs is your name, an email, and a password. Follow the instructions on the page to create your account.
- Go onto the map home page and click the plus (+) button in the top right of the information tray.
- This will take you to a sign in screen with the option to create an account. Follow the instructions above.
– The third way is to drag and drop a file into the box. To do this, open your file browser, click the file you wish to upload, and drag it over to the box and drop it.
11. Page 4/9: To add dates, click on the drop down menu and selecting the day, month, and year. Approximates are fine, and end dates are particularly useful for records of events that are over or places that may no longer exist.
12. Page 5/9: If you have an active project you can add this record to it now. Click the tick box next to the project.
13. Page 6/9: On this page you can add links. To do this copy and paste the URL into the URL box. Name the link in the box above the URL bar.
14. Page 7/9: Click on the appropriate tickboxes for your record, defining it by place and subject and making it searchable.
– For more specific subcategories click the downwards arrows on the tickboxes.
– It is is extremely important that you cite your sources and credit anyone whose work you have used.
16. Page 9/9: Your record is complete. You can save and exit, go back to previous screens, and delete your record if you want to. If you think your record is ready, click Publish.
17. Your record is now published! From your records screen you can view your record, and if you scroll down to the bottom there are options to:
How to make collections:
1. From the map home page, click the plus icon in the top right corner of the information tray. If you’re not logged in, you’ll need to log in now
2. That will take you to the contribution home screen. The three types of content are represented in three text boxes. Click New Collection.
3. You are now on an introductory page. When you’ve read it, click Begin.
– At any point in this process you can save a draft and exit, return to the previous screen, or delete your record.
5. The content goes in the text box below. There are several different options for formatting your text, including bold/italics/underline, links, quotations, and more.
– Top tip: Use regular paragraph breaks if your record is text-heavy.
6. When you’ve named and described your collection, click Next.
8. Click Browse files, then select the image you would like to upload. Press Enter, or click open or upload depending on your machine. You can only pick one cover image, so pick one that’s eye-catching and interesting.9. Page 3/5: You’ll only see this page if you have some projects active on your account, so if you don’t see a page titled Assign to a project skip this step.
10. If you do have projects active, click the box next to the project to add this collection to that project. There isn’t a limit on projects you can add it to, and if you change your mind you can click the box again to deselect. You can also remove it from the project after you have published the collection.
How to make teams:
2. The three types of content are represented in three text boxes. Click New Project.
3. You are now on an introductory page. When you’ve read it, click Begin.
– At any point in this process, you can save a draft and exit, or delete your project. You can also revisit previous pages to edit or check your work.4. Page 1/6: The first thing we need is a name and a description of your project.
– Top tip: use the formatting options in the text toolbar to make your text stand out.
5. When you’ve finished your description, click Next.