Overlays & overlay groups (deprecated)
The features within this tutorial are now located within the newer Overlays Advanced menu option within the admin area of your platform. The newer Overlays Wizard feature allows you to add your own vector and raster feature Overlays.
This tutorial is available in video and text/image.
Overlays are geo-rectified historical/antique maps or statistical data, layered on top of the base map.
Examples:
- Charles Booth’s Poverty Map on Layers of London
- World Map, 1900 on the Refugee Map
- Archaeology of Greater London on Layers of London
To access the admin area, make sure you have the proper permissions and go to your-humap-url.humap.site/admin.
If you’re not already logged in you will be redirected to your-humap-url.humap.site/log-in and presented with a log in screen.
You can also go to the homepage of your Humap and click Humap Admin, in the top-right of the screen by Explore the Map button.

You can then log in with your email and password.
This takes you to the home screen of Humap’s content management system:
If you have access to multiple Humap project admin areas, you’ll see a drop down area at the top of the screen. Click this to access the menu and then click the name of a project to go the admin area of that project.
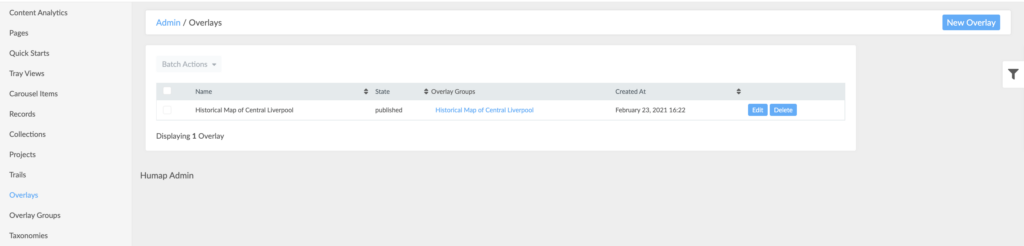
The pages that make up the content management system are listed on the left. Click Overlays to get to the Overlays dashboard.
At present, creating an Overlay takes some work from our team but we are currently working on making them self-service.
Clients provide us with geodata or a historical map. For historical maps, the scan needs to be high definition. We geo-rectify them, which means we warp the map over a historical base map to make sure that they match up. We do this in a program called MapTiler and export the map out as tile sets which are hosted on Amazon S3.
Creating an Overlay & Overlay group in the CMS points to these tiles.
From this dashboard you can edit or delete existing Overlays and create new ones.
How to add new overlays:
Click New Overlay.

Add a name and a URL for the Overlay.
Use the Overlay Groups box to tag it with any relevant Overlay groups.
If you would like to create an Overlay group with the same name, click the Yes checkbox next to the question.
Use the Overlay Type checkboxes to signify if the Overlay uses raster or vector data.
Rasters are image files, which are typically scans of historic hand drawn maps. Vectors are mathematical points that represent data on the map and will have associated metadata such as identification number, title, description, taxonomies.
When you’re finished on this page, click Date and Location in the Overlay toolbar.
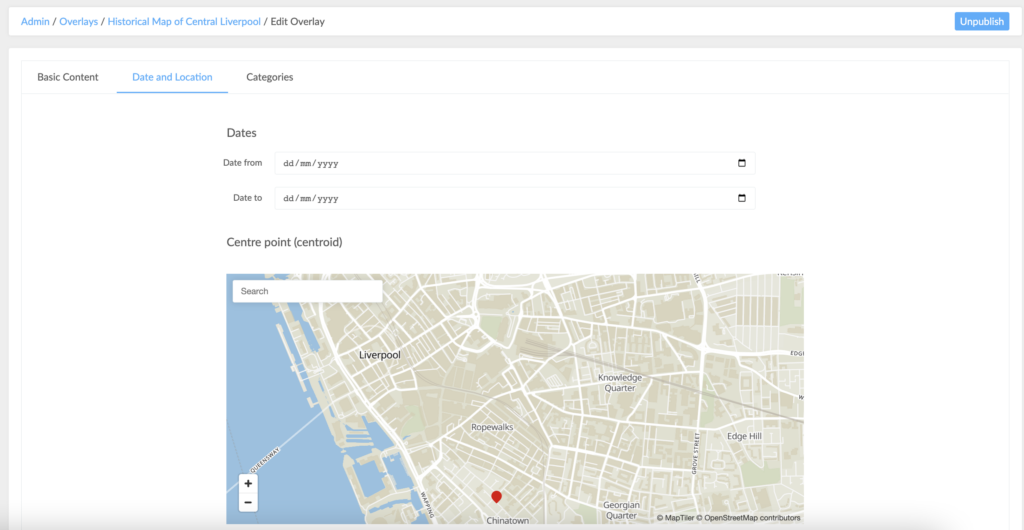
Does your Overlay have dates? If so, you can write them in the Date From (start date) and Date To (end date). You can also click the calendar icon at the end of the text box to select a date from there.
Your Overlay pin needs a location. You can use the text box in the map to search (via postcode or place name) or use latitude and longitude.
When you’ve found the location, click the map to drop the red pin.
When you’re happy with the location, click Categories.
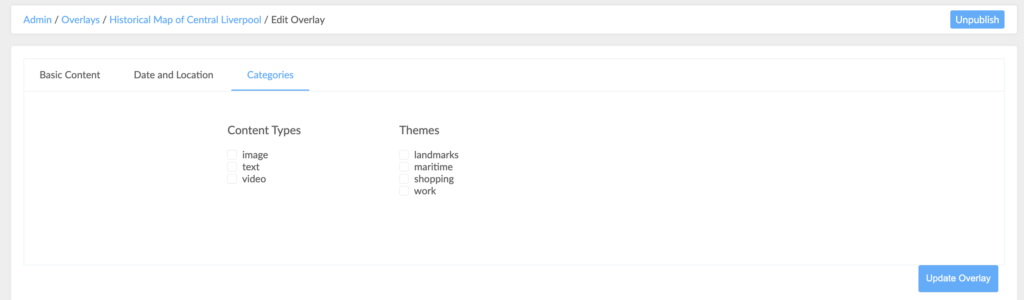
Tick the appropriate boxes for your Overlay.
Remember, you can come back and edit this at any point.
Your Overlay is complete! This is how it will look on the map:
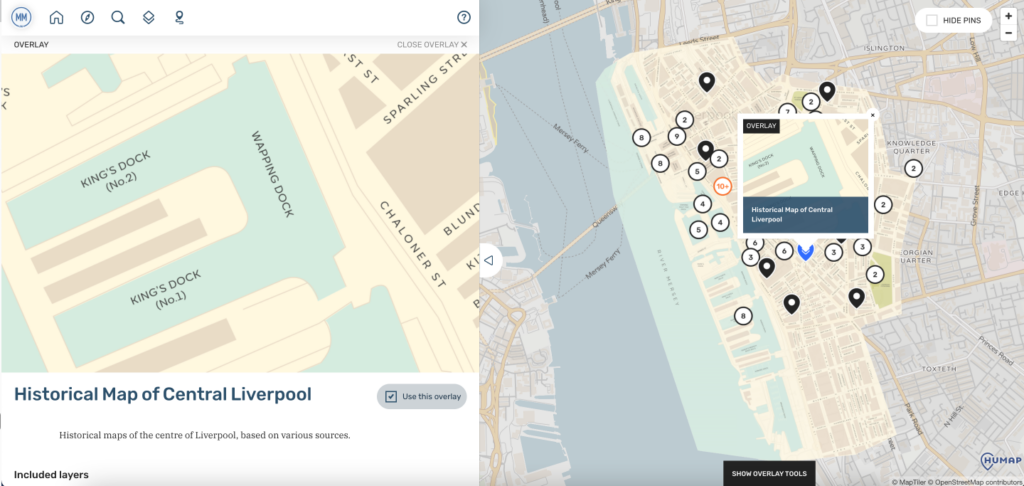
Click here to see the map in situ!
Overlays can also be grouped along a similar theme or topic.
Here is the Overlay group dashboard. Here you can edit and delete existing Overlay groups and create new ones.

To create a new Overlay group, click New Overlay Group.
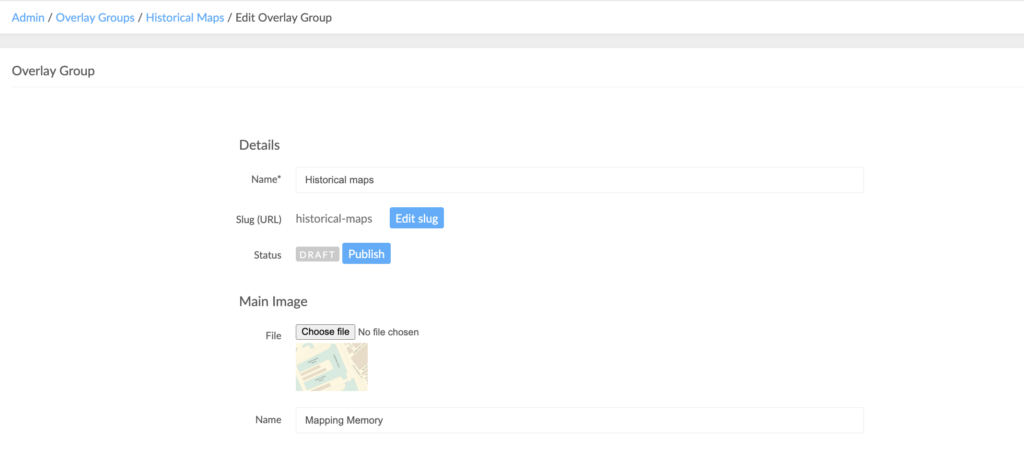
Add a title into the Title Text Box. The slug (URL) will auto-generated based on your title.
If you aren’t happy with the slug, click Edit Slug to change it.
Click Choose File and upload a representative image of your Overlay group. Name it in the box below.
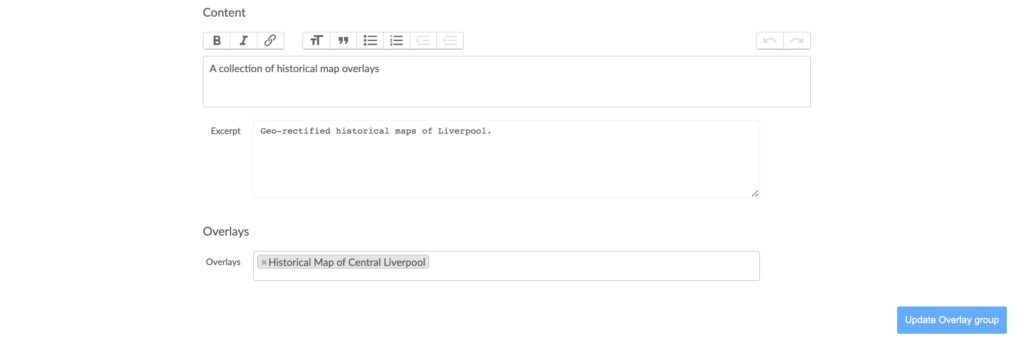
The Content text box will be the description of your collection’s content. Use the formatting options in the toolbar to make your text pop, and remember to use frequent paragraph breaks!
The Excerpt will show on the preview of your collection, so it’s best to sum up your collection with something that will make other people click on it.
click the Overlays text box beneath the Excerpt box. This will create a drop down menu with a list of available Overlays.
Click the Overlays relevant to this list.
Done!