Website preferences
The Preferences section of the Content Management System (CMS) is where you can configure your project website.
They used to be in the same tab called Site Settings. We’ve moved things around but the process of deciding your settings is still the same, and we’ll update the video soon.
This tutorial is available in video and text/image.
We’ve updated our user experience since this video was published, but this video is still useful.
Managing your website preferences
- Log in to your Humap website.
- Click Preferences in the menu on the left to get to this screen:
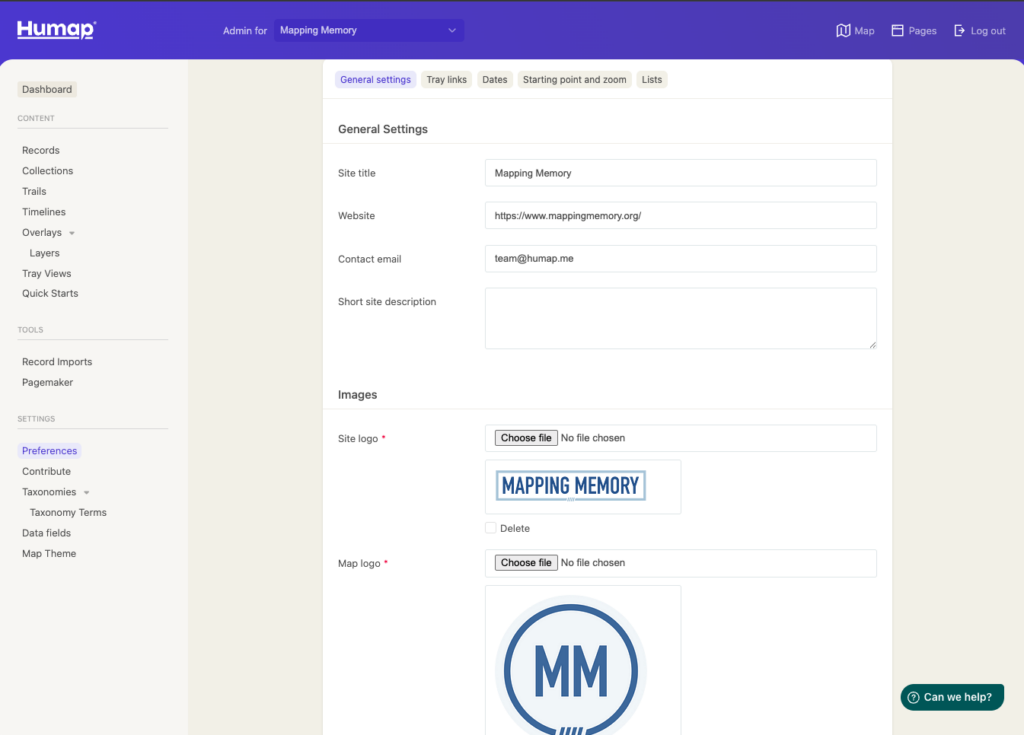
- Add a name into the Site Title text box. Don’t worry; you can come back and change this later. The site title is the name that will appear in the tab and on search pages.
- Copy and paste a URL into the Website text box. This can link to your Humap instance, a project page, or an institutional webpage.
- Add an email into the Contact Email box. This will be prominently displayed on your Humap.
- Write a short description of your sites purpose in the Short Site Description Box. This will show on search result pages.
Tray links
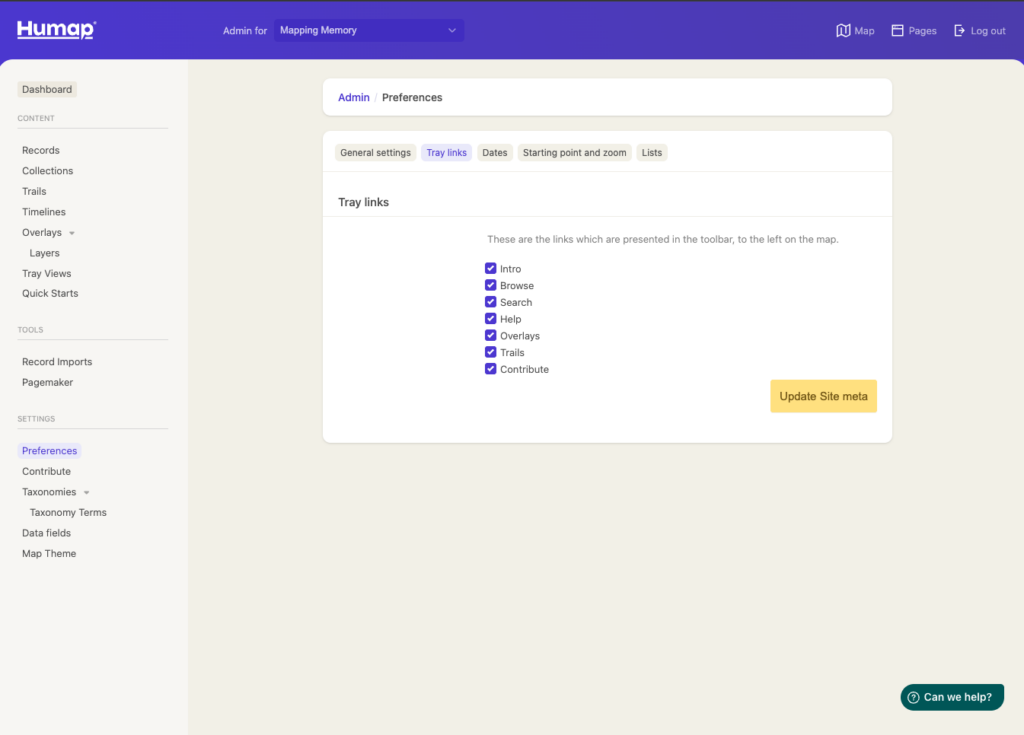
- This page will list the features available to you. Select the items you would like to be visible on the left of the map.
Dates
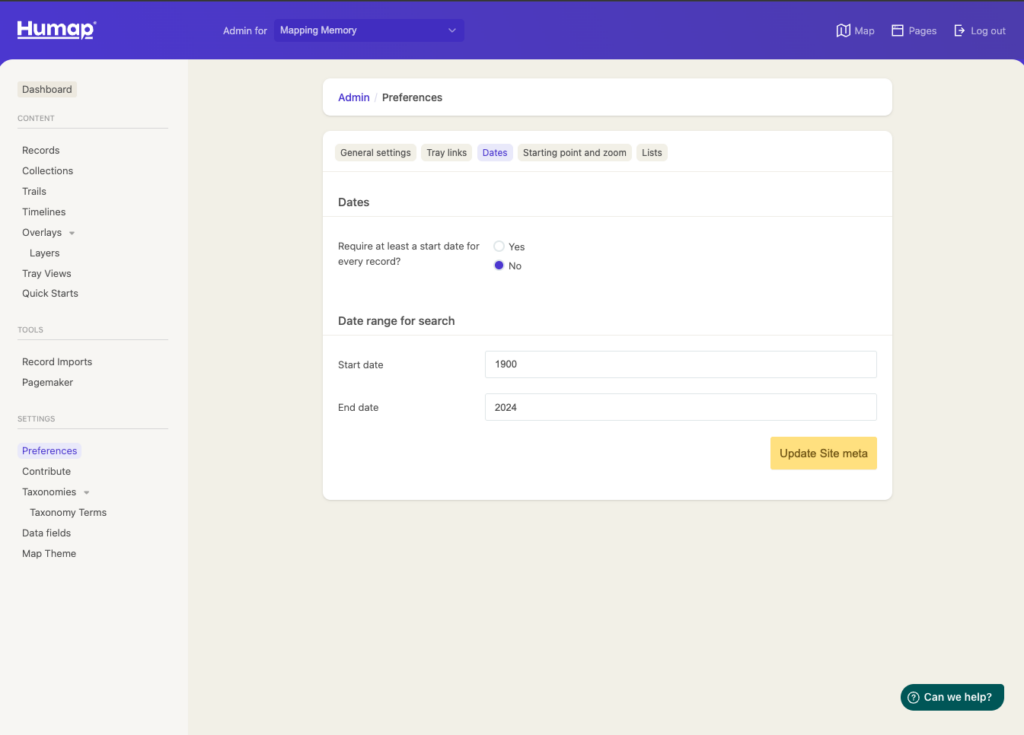
- If you want or need a start date to be present on every Record, you can indicate that here using the tickboxes.
- By default, dates on Humap are not mandatory, but they are very useful for finding and ordering specific Records.
- You can also define a date range for the search page of your Humap website using the fields underneath. You can see how this looks on the Layers of London search page.
Starting point and zoom
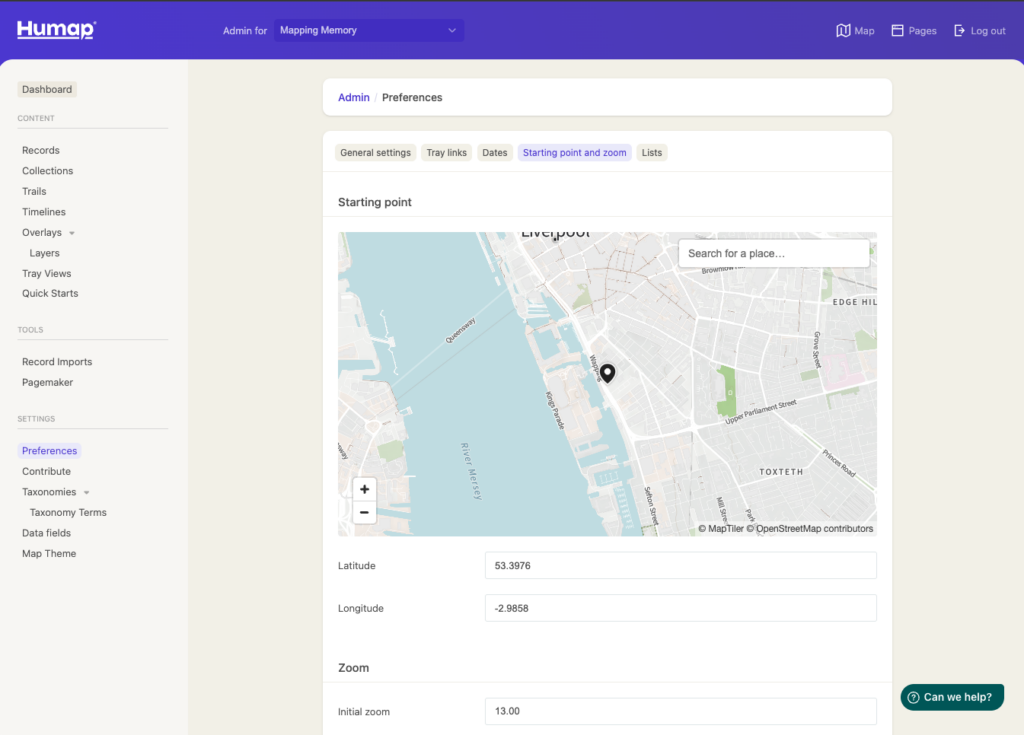
- The starting point is the centre of your map, as it will appear when someone goes to your-humap.site/map.
- Type the name of a location in the search field at the top right of the map to find your desired map centre.
- Click on the map to drop the red pin. Click somewhere else to move it.
- You can also type in the lat/long fields below if you have a specific geographic coordinate.
- Use the zoom level field to indicate how much you would like the map to zoom in on the starting point location. If your map is specific to a small area of one city, higher zoom is better. Likewise, for projects that cover a larger area a lower zoom level is needed. This may require some trial and effort!
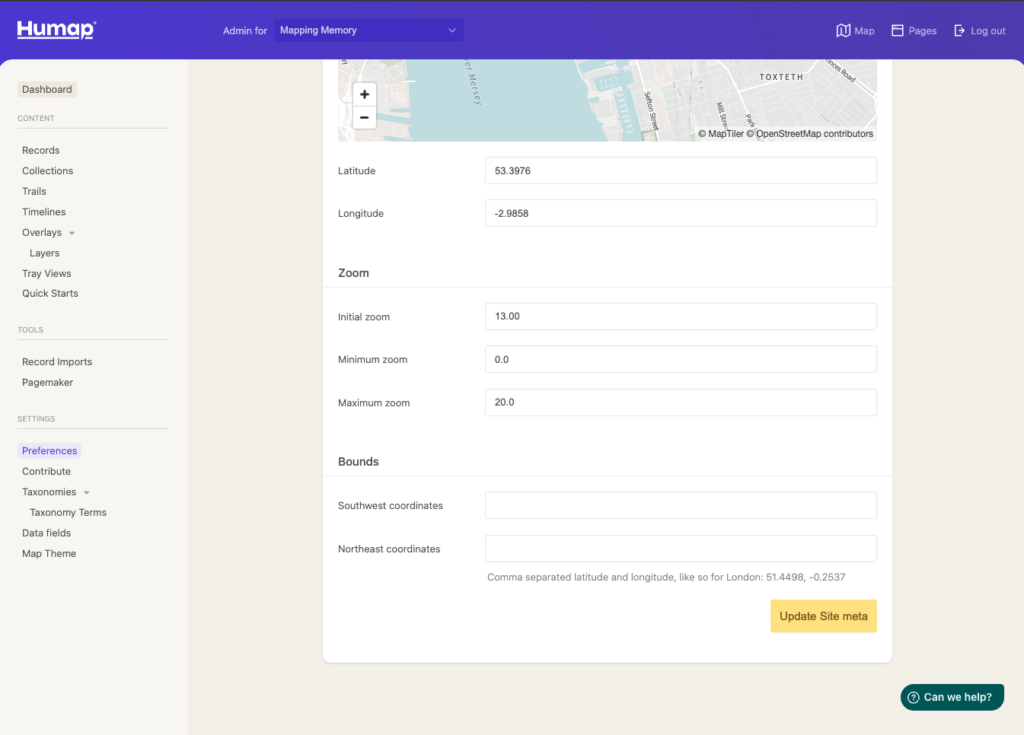
- You can also set bounds for your project by typing or pasting lat/long coordinates for southwest and northeast bounds for your map. This limits the space that will be searched for results on your map, and means your users won’t be able to pan away from the section of the map your project focuses on.
Lists
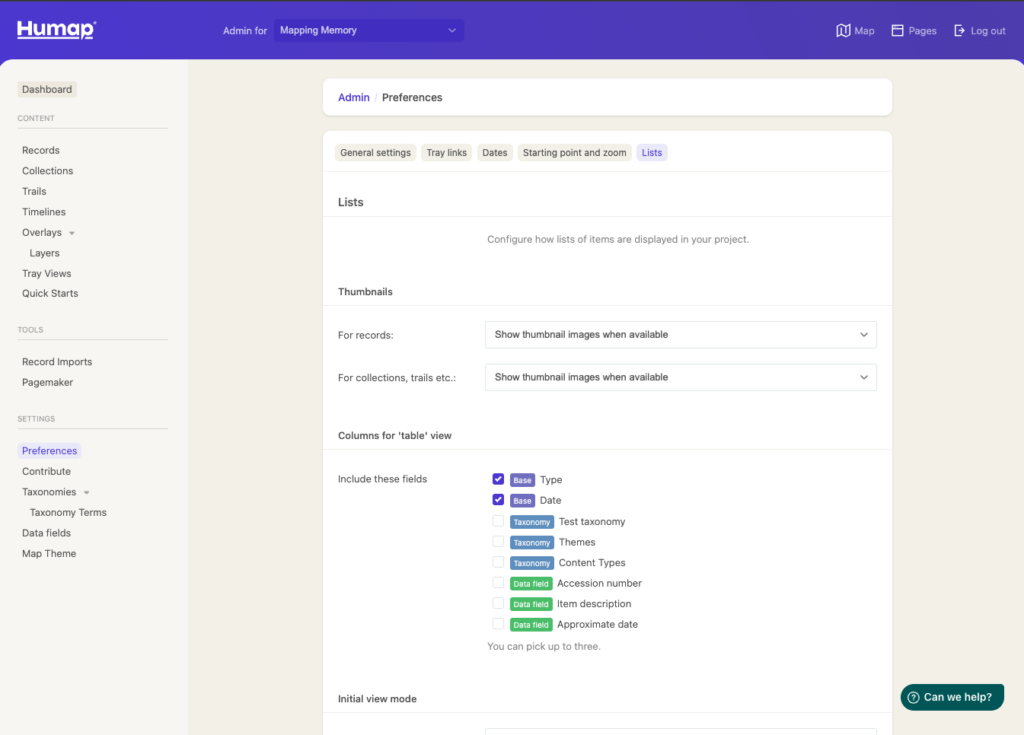
- The List tab lets users decide how lists of Humap content are displayed on the browse and results pages. You can use the drop down menus to toggle between different visual options (show thumbnail image/show text only). You can also decide which data will appear in the list view, for example:
- The data options for the list will include taxonomies and dates, and you can add more by creating Data Fields.