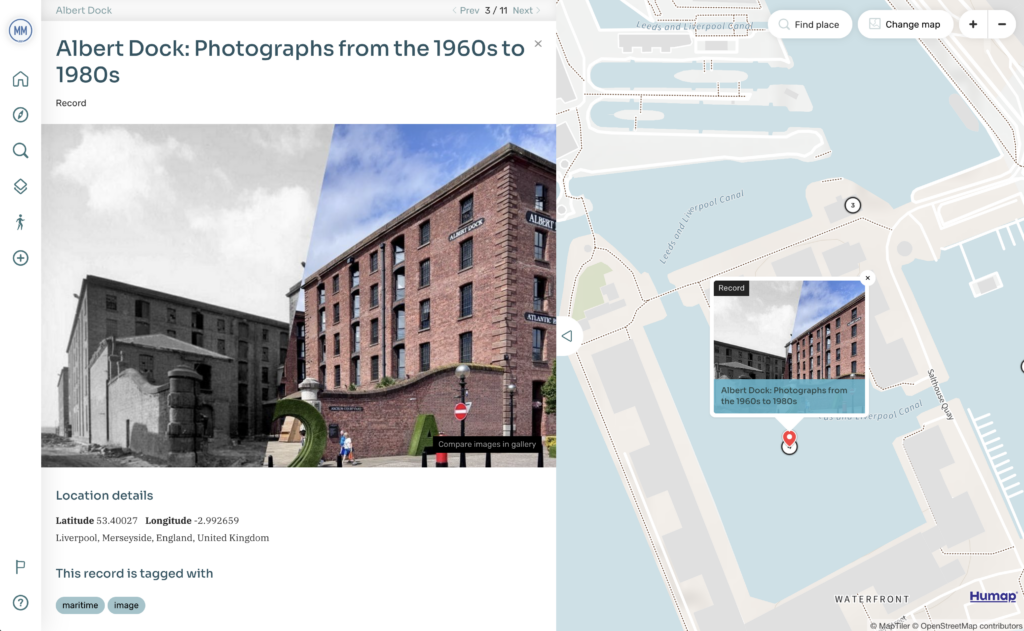
Record image comparison
The image comparison feature allows admin users and Contribute users to upload two images for visual comparison either side-by-side, or overlaid to compare via a slider tool, or fade tool. The feature is part of a record’s media section, which is presented inside the record’s gallery.
The feature is useful tool for comparing historic photographs to contemporary versions of the same scene and viewpoint.
Typically the older (historic) image will be the first image in the feature, and the more modern (contemporary) image the second image.
End user controls
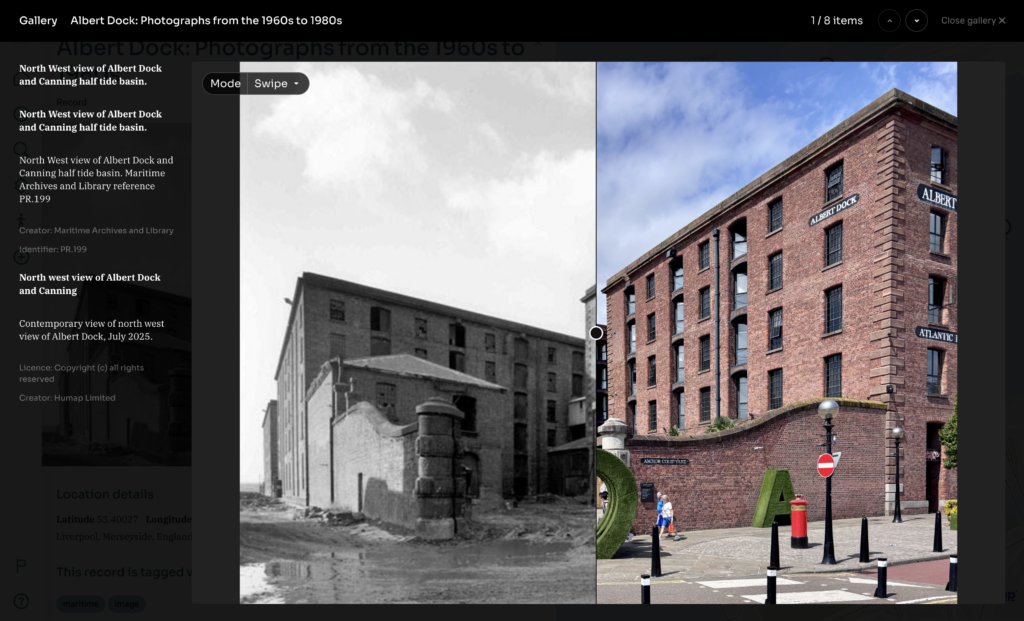
Swipe
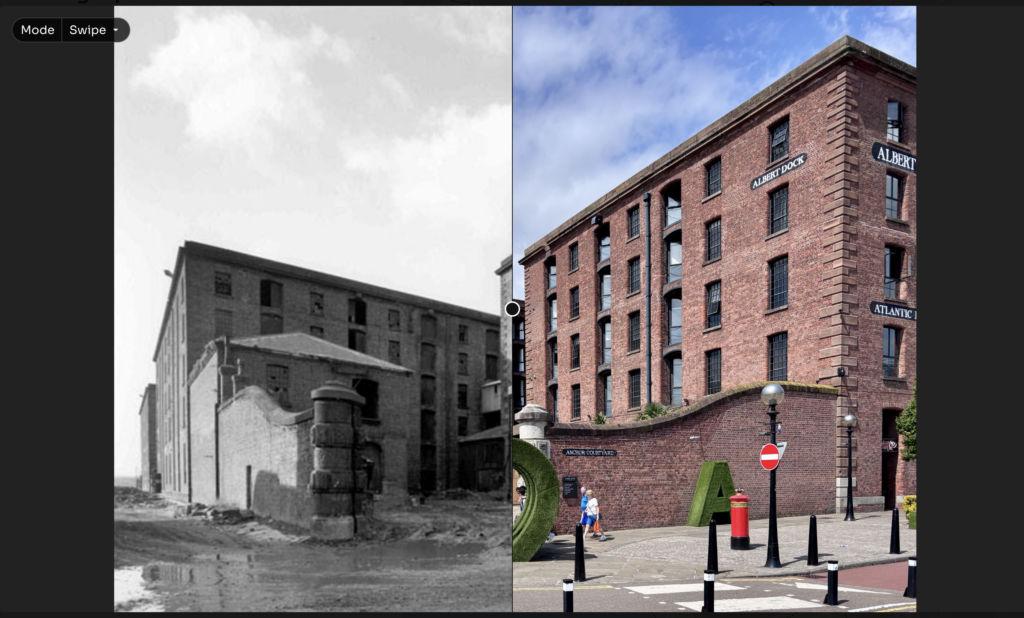
The default view for end users is the swipe view. The images are presented equally in half with a split view. The user can drag the split line circle-shaped ‘handle’ to move the split left or right to compare the two images.
The user can also zoom into both images using their mouse scroll wheel feature, or a trackpad’s or touch screen’s pinch to zoom feature. They can also move around the zoomed in images by clicking and dragging on their trackpad, touch screen or mouse.
Fade
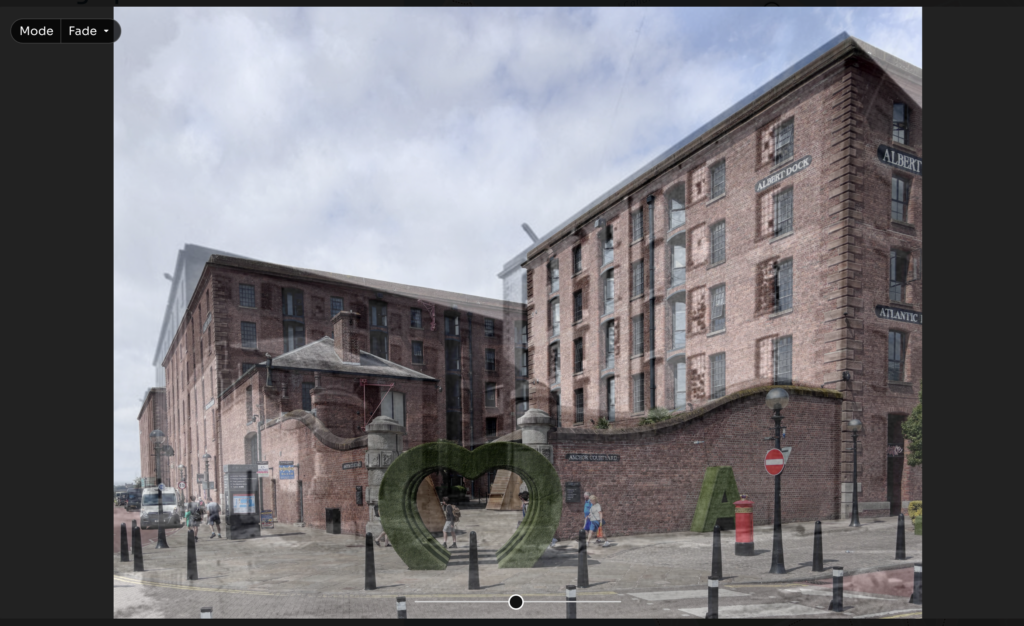
The Fade view allows users to alter the opacity of the top image (typically the contemporary image) overlaid on the bottom image (typically the older image). The initial view is at 50% opacity showing both images. The user can move the slider tool left or right to alter the opacity of the top image from 0% up to 100%.
The user can also zoom into both images using their mouse scroll wheel feature, or a trackpad’s or touch screen’s pinch to zoom feature. They can also move around the zoomed in images by clicking and dragging on their trackpad, touch screen or mouse.
Side by side
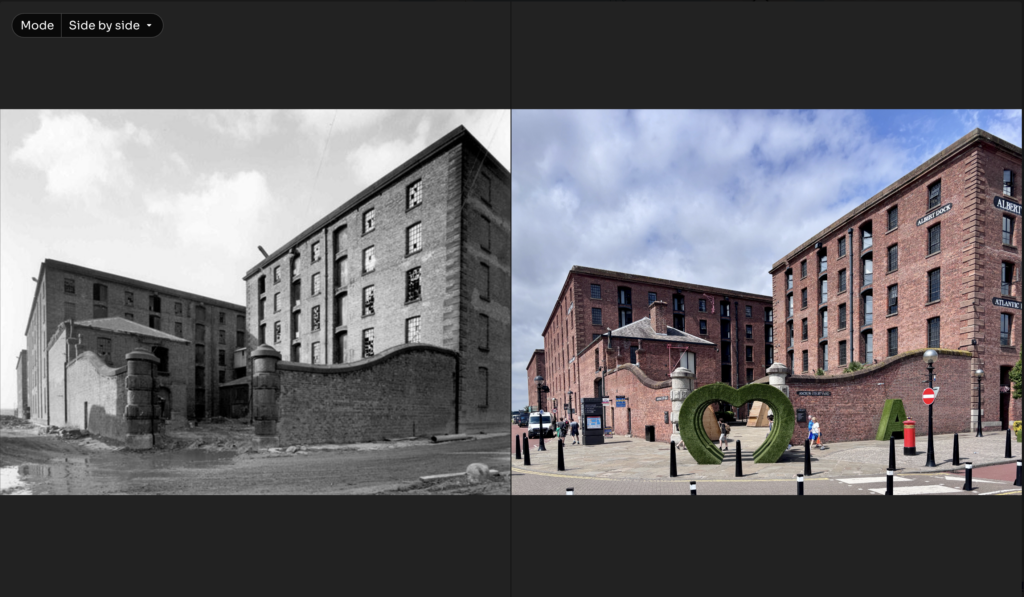
The Side by Side view presents both images next to each other. Again, the older image would typically be on the left, and newer image on the right.
The user can also zoom into both images using their mouse scroll wheel feature, or a trackpad’s or touch screen’s pinch to zoom feature. They can also move around the zoomed in images by clicking and dragging on their trackpad, touch screen or mouse.
How to create an image comparison
The image comparison feature can be created in the admin interface, or the Contribute interface. The instructions for both options are identical.
The feature can be found in a record’s media upload section in either:
- Admin > Records > Record > Attachments; or
- Contribute > Record > Images and videos

- Click on Image comparison
- You will be presented with two upload fields to add your two images. The first image is typically the older, historic image and will be presented as the bottom image in the gallery. The second image will typically be the new, more contemporary image and will be presented as the top image in the gallery.
- When you’ve uploaded both images you will be presented with a panel displaying both images. You can now edit:
- Metadata associated with both images (Name, Description)
- Metadata associated with each individual image (Name, Description, Credit, Rights Statement, Source Link, Identifier, License, Transcription)
- Once you’ve created your metadata, scroll down to the bottom of the screen and click the Save, Next, or Update button to add your image comparison to your record’s gallery.

Auto-generated record main image
If your image comparison is the only image in your record’s gallery, or the first most image in the gallery amongst others, the platform will automatically generate an image comparison image for your record’s thumbnails and main image.