Managing projects
What are map projects on Humap?
If your organisation has an institutional Humap license, people with subscription level permissions will be able to access this platform to create manage map projects and users.
This section is a tutorial for how to create and name a map and select the desired features.
Examples:
- Tampa Through Time – an archival history of Tampa FL, from the University of South Florida
- Layers of London – a crowdsourced history of London, from the Institute of Historical Research & partners
- Scarborough Atlas – Scarborough history, enriched through the collections of Scarborough Museums & Galleries
- Senfl’s World – a Renaissance musical history map of Europe, from the University of Music & Performing Arts Vienna
Resources:
This tutorial is available in video and text/image.
How to create and manage map projects
To access the subscription dashboard go to subscriptions.humap.site. if you are not logged in it will redirect you to https://subscription.humap.site/users/sign_in.
You can then use your email and password to sign in from this screen:

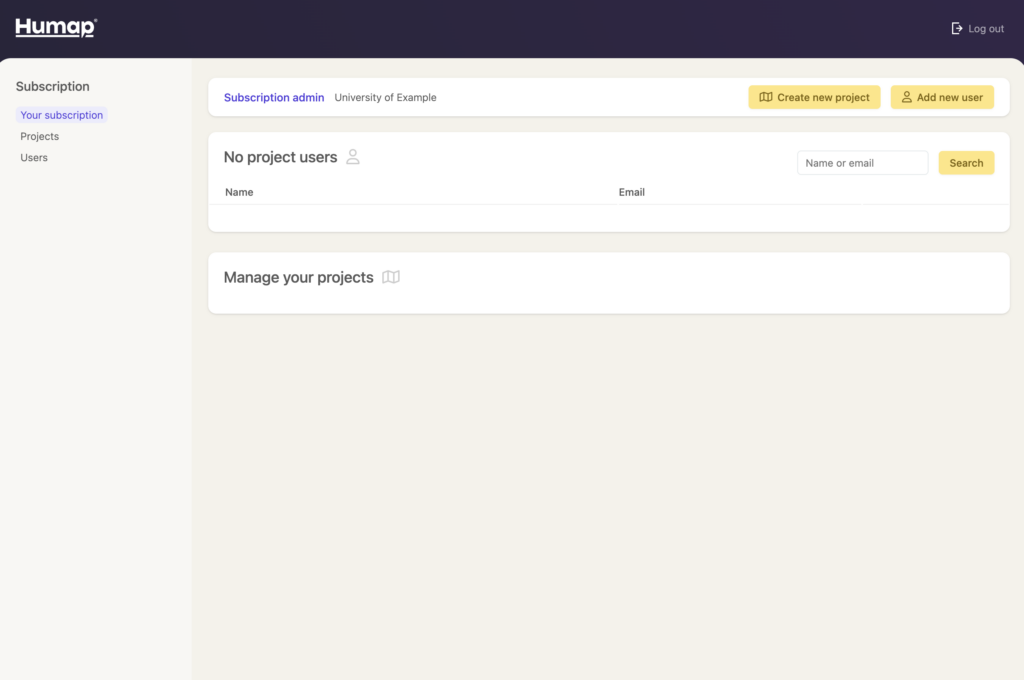
Your dashboard will look like this:

- From the subscription dashboard or the projects dashboard, click Create new project in the top right corner of the screen.
- If you haven’t created any projects (or asked us to create one for you while we prepare your dashboard), the Your Projects section will be empty.
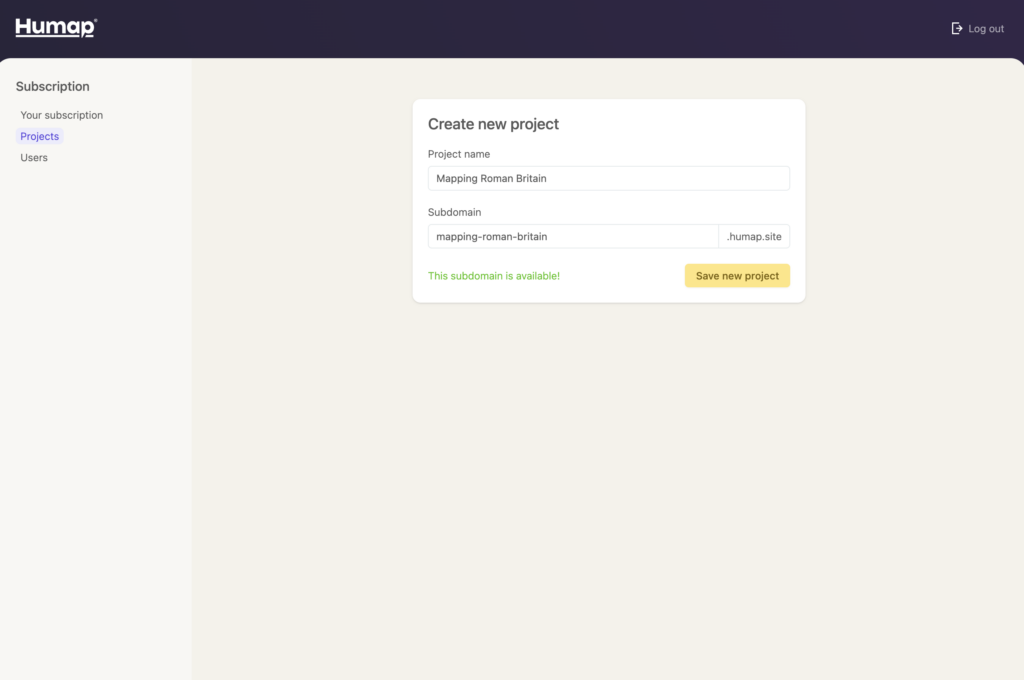
- Clicking Create new project will take you to this screen:

- Type the name of your project in the box labelled Project name.
- This will auto-generate a URL in the box below and let you know if it’s available. Click inside the box and start to type if you would like to manually change the URL.
- You can change the title and URL at a later date if desired. You can also procure a custom URL that does not end with .humap.site for your project.
- Click Save new project.

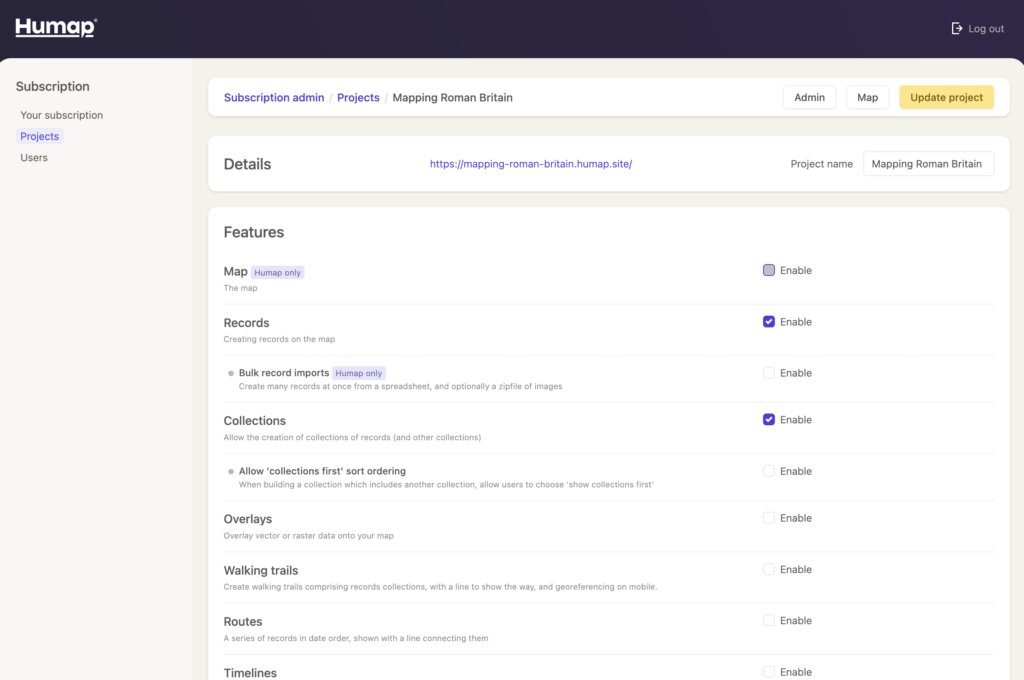
- You can then scroll through the list of available features, and indicate in the tickbox which features you would like to use for that project.
- If you would like to use a feature marked as Humap only please get in touch with us.
- When you’ve selected the features, click Update project in the top right hand corner.
- You can come back and change this later.
- Your project is now live!
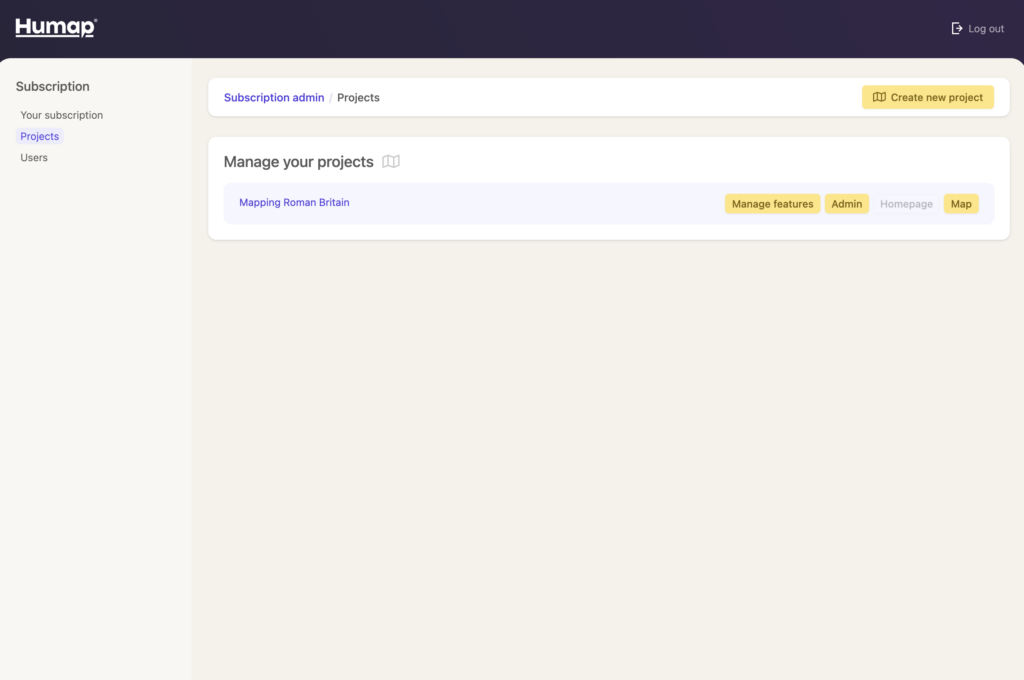
- Across the top of the page you will have several buttons:

- Clicking Admin will take you to the Admin Dashboard of your project, found at example-site.humap.site/admin.
- This is where you’ll create and curate your content. Documentation on the admin dashboard can be found here.
- Clicking Homepage will take you to the homepage for your project’s website.
- Please note that unless you have enabled webpages for this project, and a webpage has been created in the admin dashboard, a homepage will not be available and an error message will appear. Your default homepage will live at example-site.humap.site.
- Clicking Map will take you to the map screen of your project. This page lives at example-site.humap.site/map.
- Your project will also appear on your Subscriptions and Projects Dashboards.

